Steps for Installing a Sprinkler System
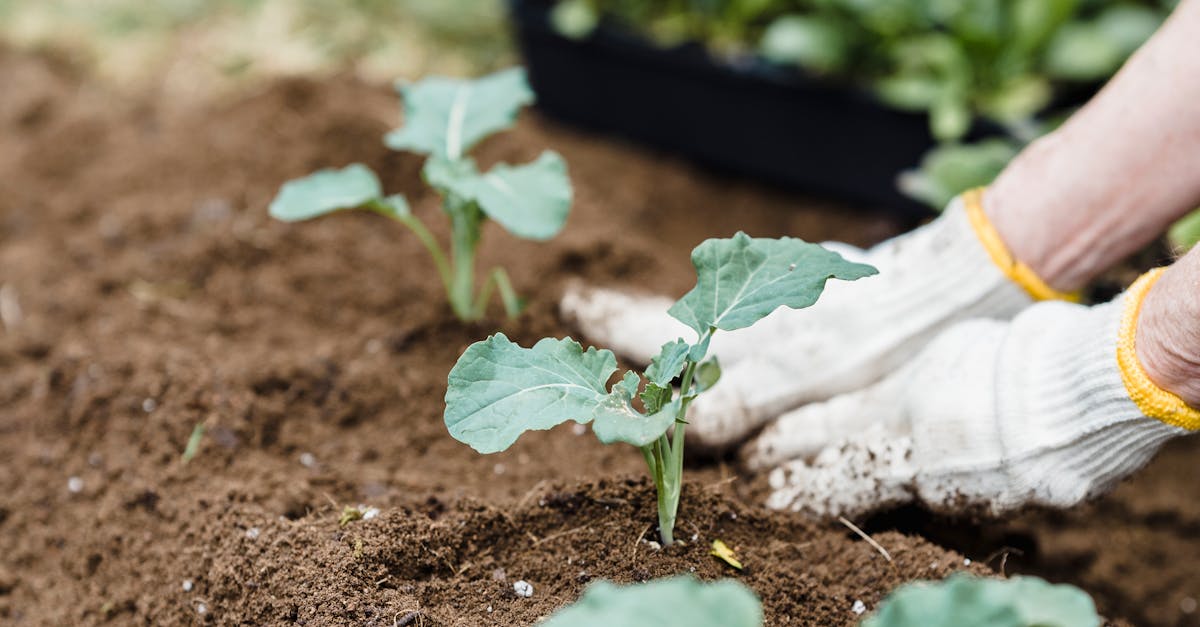
Table Of Contents
Attaching Sprinkler Heads
When attaching sprinkler heads to the pipes, ensure they are positioned at the designated spots along the pipes as per your system design. Make sure the heads are securely attached to the pipes using appropriate fittings to avoid any leaks or dislodgement during operation. Proper alignment and placement of the sprinkler heads are crucial for effective water distribution and coverage across your lawn or garden.
After securely attaching the sprinkler heads, make sure they are at the correct height to ensure optimal water distribution. Adjust the height of the sprinkler heads as needed to avoid obstacles or uneven watering. Additionally, check the angle of the heads to ensure they are pointing in the desired direction for maximum coverage. Proper installation of the sprinkler heads will ensure efficient watering and healthy growth of your landscape.
Here is a great resource for anyone looking to expand on this topic.
Install the sprinkler heads at designated spots along the pipes
When installing a sprinkler system, it is crucial to place the sprinkler heads at specific locations along the pipes to ensure optimal coverage of the designated area. The positioning of the sprinkler heads plays a significant role in the efficiency of the system. Make sure to space the sprinkler heads evenly to avoid overwatering or leaving dry spots in the landscape. Conduct a thorough analysis of the area to determine the appropriate placement for each sprinkler head based on the water distribution requirements.
Additionally, consider factors such as the water pressure in the system, the type of plants in the area, and the layout of the landscape when deciding where to install the sprinkler heads. Adjust the angle and reach of each sprinkler head to guarantee that water is distributed evenly and effectively across the entire area. Proper positioning of the sprinkler heads will result in a well-watered and healthy landscape while conserving water and reducing wastage.
Connecting Valves and Timer
Before you start connecting the valves and timer for your sprinkler system, make sure that all necessary components are readily available. Begin by attaching the control valves to the main water supply line. This step is crucial as the valves will regulate the flow of water to different zones of the sprinkler system.
Next, link the control valves to the timer according to the manufacturer's instructions. The timer is an essential component as it allows you to schedule the watering times for each zone of the sprinkler system. Ensure that the wiring is done correctly to avoid any malfunctions during operation. Once the valves and timer are securely connected, proceed with the testing phase to ensure everything is functioning properly before completing the installation process.
Connect control valves to the main water supply and link them to the timer
To properly connect the control valves to the main water supply and link them to the timer, begin by identifying the main water line that will supply the sprinkler system. Ensure that the main water valve is turned off before proceeding with any connections. Once the main water line is located, cut into the pipe using a pipe cutter to create a section where the control valves can be attached. Use the appropriate connectors and fittings to secure the control valves in place, ensuring a tight and leak-free connection.
Next, connect the control valves to the timer using low-voltage electrical wiring. Check the manufacturer's instructions for the correct wiring configuration, as this may vary depending on the specific timer model being used. Once the wiring is properly connected, mount the timer in a secure location near an electrical outlet. Make sure the timer is easily accessible for programming and monitoring. Once all the connections are made, double-check the setup to ensure everything is secure and correctly linked.
Testing the System
After completing the installation of your new sprinkler system, the final step is to test the system to ensure that everything is functioning properly. Begin by turning on the water supply to allow water to flow through the pipes and reach the sprinkler heads. Take a walk around your yard to observe each sprinkler head and check for any leaks, blockages, or other malfunctions.
It is important to make sure that all the sprinkler heads are spraying water evenly and covering the designated areas effectively. If you notice any issues such as uneven spray patterns or areas that are not being watered adequately, adjustments may need to be made to the positioning or angle of the sprinkler heads. Additionally, check the connections between the control valves, timer, and main water supply to ensure that there are no leaks or loose fittings. By carefully inspecting and testing your new sprinkler system, you can address any potential problems early on and enjoy a well-maintained lawn or garden.
Turn on the water supply and check for any leaks or malfunctions
After successfully connecting the control valves to the main water supply and linking them to the timer, it is time to turn on the water supply to test the sprinkler system. Slowly open the valve to allow water to flow into the pipes. Listen carefully for any unusual sounds or vibrations that may indicate a problem within the system.
Once the water is flowing through the pipes, walk around the designated sprinkler areas to check for any leaks or malfunctions. Look for any water seepage around the connections, valves, or sprinkler heads. Additionally, make sure that all the sprinkler heads pop up properly and that water is being distributed evenly across the designated areas. If any issues are detected, turn off the water supply immediately and address the problem before proceeding with the installation.
FAQS
What tools are needed to install a sprinkler system?
Some common tools needed to install a sprinkler system include a shovel, pipe cutter, Teflon tape, PVC cement, and a wrench.
How deep should the trenches be for laying the pipes of a sprinkler system?
Trenches for laying pipes of a sprinkler system should be at least 6 inches deep to protect the pipes from damage and to ensure proper water distribution.
Can I install a sprinkler system myself, or should I hire a professional?
Installing a sprinkler system can be a DIY project for those with some basic plumbing skills. However, if you are unsure or uncomfortable with the process, it's best to hire a professional to ensure proper installation.
How do I determine the water pressure for my sprinkler system?
You can determine the water pressure for your sprinkler system by using a pressure gauge on an outdoor spigot. The ideal water pressure for a sprinkler system is typically between 30-50 psi.
How often should I test my sprinkler system for leaks or malfunctions?
It is recommended to test your sprinkler system for leaks or malfunctions at least once a month, especially before the start of the watering season, to ensure it is working properly.
Related Links
Understanding Sprinkler System ComponentsChoosing the Right Sprinkler System for Your Lawn
Upgrading to Smart Sprinkler Technology
Troubleshooting Common Sprinkler System Issues